Sunflower Drawing Through Art, Printing
Cross Drawing: A Practical Guide From Sketch to Print
Arslan Khokhar
September 17, 2026
A cross drawing can be a simple arrangement of intersecting lines or a highly detailed work filled with texture, symbolism, and ornament. The subject appears throughout religious art, memorial artwork, architecture, jewelry, textiles, logos, and contemporary illustration. In Christian art, different cross forms can represent faith, sacrifice, resurrection, or a particular tradition. Celtic crosses often combine a cross with a circle and interlaced patterns. Other cross shaped designs may be decorative, mathematical, cultural, or completely abstract.
Because meanings vary, artists should consider context before borrowing symbols from a religious or cultural tradition. A floral cross designed for a greeting card, for example, communicates something different from a historically specific Christian cross or a memorial image. Thoughtful research makes the artwork both stronger and more respectful.
Understanding Cross Shape and Proportion
The basic cross consists of a vertical bar intersected by a horizontal bar. Symmetry is usually important, although expressive and abstract drawings may intentionally break it. A traditional Latin cross has a longer lower arm, while a Greek cross uses four arms of equal length. Gothic, Celtic, and ornamental crosses introduce pointed ends, circles, knots, leaves, or architectural details.
Before adding decoration, establish the center line and major measurements. Decide the total height, total width, bar thickness, and location of the horizontal arm. A ruler helps beginners maintain equal widths, while professional illustrators may use grids or digital guides. Light construction lines should remain easy to erase.
Art Supplies for Cross Drawing
You do not need every material listed below. Choose supplies that match the intended style and final use.
- Smooth drawing paper for graphite pencils, ink pens, markers, and colored pencils.
- Textured drawing paper for charcoal or expressive pencil shading.
- Watercolor paper for watercolor washes and mixed media work.
- Canvas or prepared painting paper for acrylic paint.
- Graphite pencils, such as 2H, HB, 2B, 4B, and 6B.
- A kneaded eraser, white vinyl eraser, ruler, compass, and blending stump.
- Charcoal pencils or sticks for rich shadows and dramatic Gothic art.
- Fine ink pens for line art, patterns, and permanent outlining.
- Colored pencils, markers, watercolor, or acrylic paint for color.
- A drawing tablet and software such as Adobe Photoshop, Adobe Illustrator, Procreate, or Canva for digital artwork.
Heavier media requires heavier paper. Thin office paper may buckle under watercolor and can allow markers to bleed through. For finished artwork, acid free paper is preferable because it resists yellowing and deterioration better than low quality paper.
How to Draw a Cross Step by Step
- Draw a faint vertical center line. This controls the overall height and keeps the design upright.
- Mark the top, bottom, and horizontal arm positions. Check that the lower section has the proportion you want.
- Add a horizontal center line. Measure equal distances to the left and right if the design is symmetrical.
- Draw parallel lines around both center lines to establish the thickness of the arms.
- Connect the corners carefully. Use a ruler for a precise cross or draw freehand for a softer, handmade appearance.
- Erase overlapping construction lines inside the shape.
- Refine the contour with graphite, an ink pen, or a new digital layer.
- Add shading, texture, patterns, color, and background elements.
- Review the drawing at a smaller size or from across the room. Uneven proportions are easier to notice at a distance.
For clean line art, rotate the paper instead of forcing your wrist into an awkward angle. Digital artists can use symmetry guides, snapping, and shape tools, but a slightly imperfect handmade contour can add character. Keep the original sketch on a separate layer before making major digital changes.
Shading, Texture, and Three Dimensional Effects
To make the cross appear solid, imagine one consistent light source. If light comes from the upper left, place highlights on the upper and left facing planes and shadows on the lower and right facing planes. Extend a cast shadow onto the background in the opposite direction of the light.
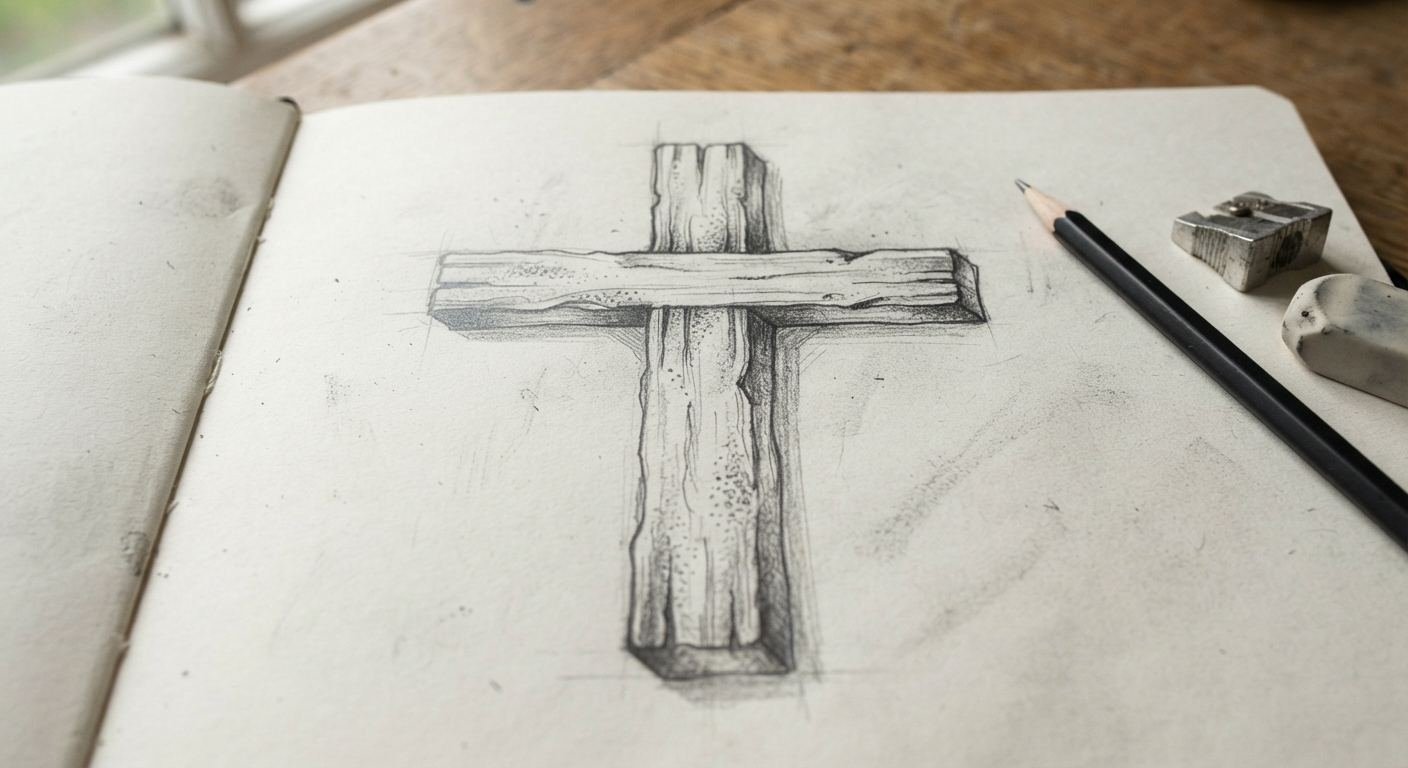
A beveled edge is one of the easiest ways to create depth. Draw a second contour just inside the first, then shade the narrow border gradually. Dark graphite, charcoal, or a multiply layer in Adobe Photoshop can strengthen recessed areas. A small bright highlight along one edge makes metal, polished stone, or varnished wood appear reflective.
Texture should follow the material. Use irregular grain lines and knots for wood, broken angular marks for stone, soft transitions for worn metal, and short curved strokes for leaves or flowers. Avoid spreading identical texture everywhere. Variation feels more natural, and some quiet areas help the detailed areas stand out.
Cross Drawing Styles and Creative Ideas
A realistic cross may feature wood grain, nails, weathered stone, engraved metal, or fabric draped across the arms. Cartoon crosses use rounded corners, bold outlines, cheerful color, and simplified shadows. Minimalist versions rely on clean geometry, negative space, and a limited palette.
Gothic crosses can incorporate pointed arches, dark shading, ironwork, roses, or cathedral inspired ornament. Celtic designs often include a circular ring and continuous knot patterns. Floral and ornamental crosses may use vines, lilies, leaves, scrollwork, or repeating borders. Religious artwork may include scripture, halos, rays of light, or carefully researched denominational forms. Abstract artists can fragment, rotate, layer, or distort the cross shape to explore balance and visual tension.
Children can fill a large outlined cross with patterns, tissue paper colors, or simple flowers. Beginners can practice proportion using graph paper. Students might compare Latin, Greek, Celtic, and decorative structures. Experienced artists can study complex knotwork, dramatic perspective, carved surfaces, or symbolic mixed media compositions.
Pencil, Ink, Paint, and Digital Methods
Graphite pencils are excellent for planning and subtle tonal work. Use harder pencils for construction and softer pencils for deep shadows. Charcoal produces bold contrast, but it smudges easily and normally needs workable fixative. Ink pens create crisp outlines suitable for scanning, coloring, and reproduction.
Colored pencils allow precise layering, while markers create flat, saturated color. Watercolor works well for luminous backgrounds and delicate floral designs. Acrylic paint provides stronger coverage on paper or canvas and can create raised brush texture. Test paint and markers on a scrap first, since paper response can vary alot.
For digital drawing, Procreate is convenient for tablet sketching, Adobe Photoshop handles raster painting and image correction, and Adobe Illustrator is ideal for scalable vector artwork. Canva can be useful for arranging completed art on cards, posters, or social graphics, though detailed drawing controls are more limited.
Common Mistakes and Practical Corrections
- Unequal arms. Add center lines and measure outward from the center rather than measuring each side separately.
- Inconsistent thickness. Draw paired guide lines and check the width at several points.
- Heavy construction marks. Begin with an H or 2H pencil and minimal pressure.
- Random shadows. Choose one light direction before shading every surface.
- Excessive decoration. Preserve open spaces so the cross remains readable.
- Flat looking edges. Add bevels, reflected light, cast shadows, or overlapping elements.
- Muddy color. Let watercolor layers dry and avoid mixing too many pigments.
- Crooked digital line art. Use guides, vector paths, stabilization, or symmetry tools, then retain only the corrections that support the intended style.
Preparing Cross Artwork for Printing
For raster artwork, aim for 300 DPI at the final print size. An 8 by 10 inch print at 300 DPI should measure 2400 by 3000 pixels. Increasing the DPI number without adding real pixel information will not restore missing detail.
RGB is designed for screens and usually offers a wider range of bright colors. CMYK represents the cyan, magenta, yellow, and black inks commonly used in commercial printing. Home inkjet printers often accept RGB files and perform their own conversion. A professional printer may request CMYK artwork or convert it using a specific color profile. Ask before converting, since an incorrect profile can produce dull or shifted colors.
Include bleed when ink must reach the trimmed edge. A common bleed is 0.125 inch on every side, but printer requirements differ. Keep important lines, text, and decorative details inside the safe margin. Confirm image dimensions, orientation, print size, and trimming specifications before submitting the file.
Recommended formats include:
- PNG for transparent backgrounds and clean digital graphics.
- JPEG for compact photographic or painted images, preferably saved at high quality.
- PDF for print ready layouts containing artwork and text.
- TIFF for high quality raster artwork with minimal compression concerns.
- SVG for scalable vector crosses, logos, cutting files, and simple line illustrations.
Scanning and Photographing Hand Drawn Art
Scan flat artwork at 300 to 600 DPI. Use 600 DPI for delicate line art or artwork that may be enlarged. Clean the scanner glass first, and scan in color even when the original seems monochrome because this can preserve subtle paper and graphite tones.
If photographing the artwork, place it on a flat surface with two evenly positioned lights. Keep the camera parallel to the page to prevent distortion. Avoid direct glare, harsh shadows, and mixed lighting colors. Correct perspective, white balance, dust, and contrast digitally, but do not erase intentional paper texture or drawing character.
Choosing a Printing Method and Surface
Home inkjet printers can produce attractive small prints, greeting cards, stickers, and bookmarks when paired with suitable ink and paper. Laser printers are fast and useful for crisp graphic work, but they may not reproduce subtle watercolor transitions as naturally. Always check whether specialty cardstock or sticker material is compatible with the printer.
Professional printing is preferable for large posters, apparel, canvas, accurate color matching, and larger quantities. Giclée printing uses high quality inkjet equipment, archival pigment inks, and fine art paper or canvas. It is a strong option for limited art prints, although the term should be supported by the printer’s actual materials and process.
Paper weight affects durability. Greeting cards and postcards need heavier cardstock, while wall art may use cotton rag paper, matte art paper, glossy stock, or canvas. Smooth paper emphasizes sharp line art. Textured paper complements charcoal, watercolor, and traditional looking subjects. Request a proof when color accuracy is essential.
Copyright, Selling, and Respectful Use
An original cross drawing is generally protected by copyright once it is created, although registration can provide additional legal advantages in the United States. Owning a physical print does not automatically transfer reproduction rights. Artists selling downloads, prints, apparel, or stickers should clearly state permitted uses.
Do not copy another artist’s distinctive cross, logo, tattoo design, or commercial illustration without permission. Historical symbols may be public domain, but a modern interpretation can still be protected. When using religious or cultural imagery, identify its context accurately and avoid claiming that every cross has the same meaning.
Care, Storage, Framing, and Display
Store original drawings and prints flat in acid free sleeves or archival folders. Keep them away from moisture, direct sunlight, smoke, and large temperature changes. Place glassine between charcoal works and other surfaces so loose material does not transfer.
For display, use acid free mats and backing boards. Ultraviolet filtering glazing helps reduce fading, but it does not eliminate it. Acrylic paintings on canvas may be displayed without glass, while delicate works on paper usually benefit from glazing and a properly sealed frame.
Frequently Asked Questions
What is the easiest cross style for a beginner?
A simple Latin or Greek cross drawn with a ruler is the easiest starting point. Add shading or decoration only after the proportions look correct.
Which pencil should I use for the first sketch?
Use an H, 2H, or lightly handled HB graphite pencil. These choices make construction lines easier to erase.
How can I make a cross look three dimensional?
Add side planes, beveled edges, consistent highlights, and a cast shadow. Keep all shadows related to one imagined light source.
Is 300 DPI always enough for printing?
It is the standard target for most close viewing prints. Large posters viewed from farther away may use a lower effective DPI, while fine line art can benefit from 600 DPI.
Should cross artwork be saved in RGB or CMYK?
Keep an editable RGB master unless your printer requests a specific CMYK profile. Convert a copy for production so the original color information remains available.
What file format is best for a cross logo?
SVG is usually best for a simple vector logo because it can scale without losing sharpness. PDF is also widely accepted for professional printing.
Can watercolor cross artwork be printed on canvas?
Yes. Scan or photograph it at high resolution, correct the color carefully, and request a proof before ordering the final canvas.
Can I sell a drawing based on a traditional cross?
Often yes, if the underlying symbol is not protected and your interpretation is original. Avoid copying modern artwork, logos, or distinctive commercial designs.
Share It
Previous Post
Recent Posts